
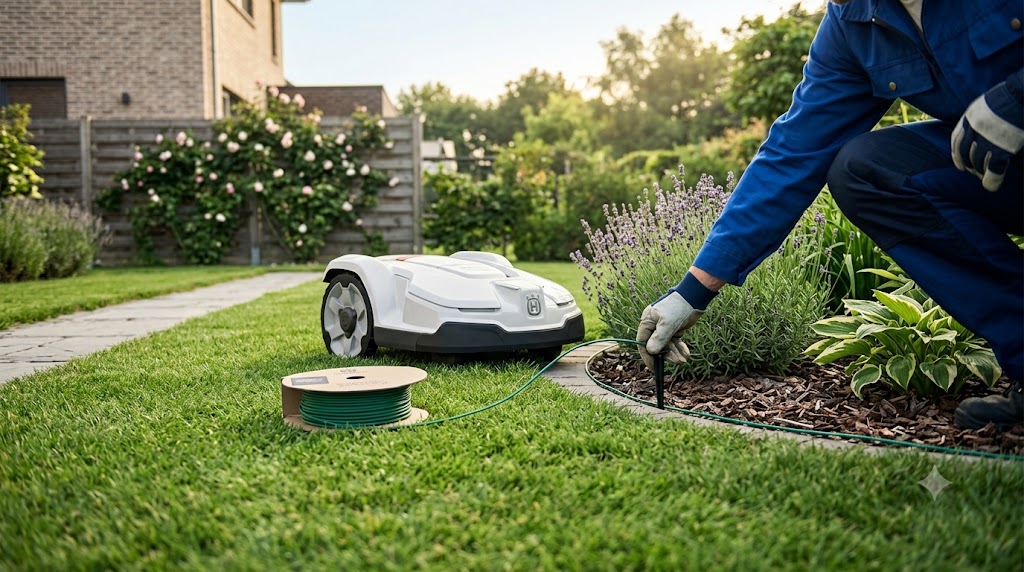
My first Automower install took twice as long as it should have because I bought the wrong kit size. I measured the lawn, guessed at a wire length, and ran out about four meters from closing the loop, on a Sunday evening with every hardware store closed. A quick trip to splice in extra wire fixed it, but it was an avoidable delay.
Here’s the direct answer: the Automower 115H uses a wired boundary and guide wire system, and Husqvarna sells official installation kits in three sizes, small (150m wire, covering up to 800 m² of open lawn), medium (250m wire, up to 2000 m²), and large (400m wire, up to 5000 m²), each bundled with matching wire pegs, splice connectors, and couplers. Since the 115H covers up to 0.4 acres (about 1,618 m²), most 115H owners land squarely in the medium kit range, though a simple, open yard under 800 m² can get by with the small kit.
This guide breaks down what’s actually in these kits, how to pick the right size, what the wire gauge differences mean in practice, and which official and third-party kits are worth buying for extensions, repairs, or a first install.
What’s Actually in an Automower Boundary Wire Kit?
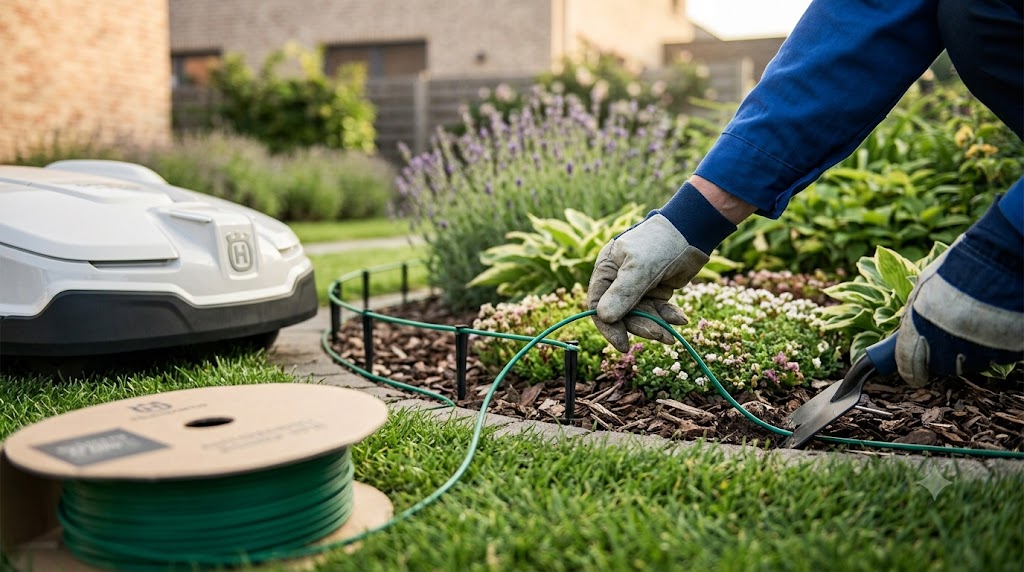
Every official Husqvarna installation kit contains the same four components, just in different quantities depending on kit size: loop wire (used for both the boundary and the guide wire), wire pegs (also called staples or stakes) to anchor the wire to the ground, splicers to join wire ends at the charging station connection, and connectors (couplers) to join separate wire segments together.
Husqvarna’s own installation guidance confirms the boundary wire and guide wire are the exact same wire type, just used for two different jobs: one wire defines the mowing area’s outer edge, and a second run (the guide wire) creates a path back to the charging station. Since the 115H specifically requires a guide wire to reliably find its way home, unlike some GPS-assisted Automower models, this isn’t optional wiring for a 115H owner. It’s part of a functioning install.
You don’t have to bury the wire. Husqvarna’s guidance notes the wire can simply be stapled to the surface of the lawn, and within a few weeks of regular mowing it settles into the grass and becomes nearly invisible.
Choosing the Right Kit Size for Your 115H
Kit sizing comes down to your lawn’s actual footprint, not the mower model. Since the 115H tops out at 0.4 acres of coverage, here’s how that lines up against Husqvarna’s official kit tiers:
| Kit | Loop Wire | Pegs | Splicers | Connectors | Max Open Lawn | Max Complex Lawn |
|---|---|---|---|---|---|---|
| Small | 150m | 300 | 3 | 5 | 800 m² | 400 m² |
| Medium | 250m | 400 | 3 | 5 | 2,000 m² | 1,000 m² |
| Large | 400m | 600 | 5 | 5 | 5,000 m² | 2,500 m² |
A “complex” lawn in Husqvarna’s terms means one with more corners, obstacles, or islands to route wire around, which eats up more wire per square meter of actual grass than a simple open rectangle does. If your 115H’s lawn is a simple shape near the mower’s 0.4-acre limit, medium is usually the safer starting point over small, since running short mid-install means an unplanned second order.
Boundary Wire Gauge: Standard vs. Heavy Duty
Husqvarna sells more than one wire thickness, and the difference matters more for durability than for how the mower actually reads the signal. Husqvarna’s Heavy Duty boundary wire is specified with a 3.4mm outer diameter and a 100% copper core, built for larger or more demanding installations where the wire needs to survive years of lawn traffic, edging tools, and weather exposure. The standard wire included in entry-level kits is thinner, adequate for most straightforward residential lawns but more prone to nicks from edging tools or lawn aerators over time.
Third-party universal boundary wire sold for Automower-compatible systems often lists a roughly comparable 16 AWG copper conductor at that same 3.4mm outer diameter, which gives you a rough reference point if you’re comparing gauge specs across brands. If your lawn has a lot of edging, exposed roots, or gets regular foot traffic near the wire’s path, the heavier-gauge option is worth the modest price difference over standard wire.
Adding a Boundary Wire Extension or Island
If your landscaping changes after your original install, adding new area isn’t a full reinstall. Husqvarna confirms you can add an island (an excluded zone within your existing boundary, like a flower bed or pond) after the initial installation simply by splicing new wire into the existing boundary loop using a splicing kit and some additional wire.
The same logic applies to extending your boundary if you’ve expanded your lawn since the original install. Rather than buying a full new kit, most owners only need enough additional wire to cover the new distance, plus enough connectors to splice the new run into the existing loop cleanly. Husqvarna does note that while you can use wire purchased elsewhere, they recommend sticking with wire from an official installation kit since it’s tested specifically for the system’s signal requirements.
Wire Pegs: How Many You Actually Need
Pegs are the part people most consistently run short on, especially on lawns with a lot of curves, slopes, or tight corners where wire needs more frequent anchoring to stay flush with the ground. The official kits scale peg count with wire length (300 pegs for 150m of wire, up to 600 pegs for 400m), which works out to roughly one peg every half meter under ideal conditions, but uneven or hilly terrain often needs pegs spaced closer together to keep the wire from lifting.
Buying a bulk peg pack separately is a common and inexpensive way to avoid running short mid-install, particularly for a first-time installation on a lawn with a lot of contour changes. Since pegs are reusable and rarely wear out on their own, having spares on hand costs little and saves a mid-project trip to buy more.
Splice Kits and Connectors: Repairing a Broken Wire
Boundary wire breaks happen, usually from an edging tool, a garden fork, or occasionally a curious pet digging in the wrong spot. Husqvarna’s official Boundary Wire Repair Kit is built specifically for this: it includes 5 meters of replacement wire, 6 couplers, and 10 staples, enough to cut out a damaged section and splice in a fresh run without redoing the whole boundary.
The splicing process itself doesn’t require special tools beyond the connectors and a pair of pliers to crimp them. Waterproof, gel-filled connectors are worth insisting on regardless of brand, since a connection that lets moisture in in one of the more common causes of an intermittent “no loop signal” fault months after a repair looks like it worked.
Best Boundary Wire Kits and Accessories for the 115H
Husqvarna Automower Small Installation Kit (up to 1/4 acre): Genuine Husqvarna kit with 150m of loop wire, 300 pegs, splicers, and connectors, sized for smaller, simpler 115H lawns.
Husqvarna Automower Large Installation Kit: Genuine Husqvarna kit with 1,312 feet (400m) of loop wire, 600 staples, 5 splicers, and 5 connectors, built for larger or more complex 115H installs near the mower’s 0.4-acre limit.
Husqvarna Automower Heavy-Duty Boundary Wire, 1,640 feet: Genuine 3.4mm, 100% copper core wire on a full 500m spool, useful as a standalone extension or upgrade over standard kit wire.
Husqvarna Automower Boundary Wire Repair Kit: Genuine splice kit with 5 meters of wire, 6 couplers, and 10 staples, sized for quick repairs after a wire break rather than a full reinstall.
ECENCE Boundary Wire Lawn Pegs, Set of 200: A bulk, budget-friendly peg pack compatible with Husqvarna Automower systems, useful for topping up a kit on hilly or contoured lawns.
GWHOLE Waterproof IDC Wire Connectors for Automower: Gel-filled, waterproof splice connectors sized for boundary wire repairs, sold specifically listing Automower compatibility.
If you’re setting up a new install and want to check your mower’s cutting performance is right before your first real mow, our Automower 115H blade replacement guide covers getting the blades ready to go.
A Few Installation Notes Worth Knowing
Mow your lawn short around the perimeter before installing wire, so it lays as close to the ground as possible rather than sitting up in tall grass where the mower’s wheels can snag it. Walk the planned wire path first and fill in any holes or repair any exposed roots, since those cause more install headaches than the wire itself does. And confirm you have basic tools on hand before starting: Husqvarna’s own installation guidance says a pair of pliers, a mallet, and a small garden shovel cover everything the wire and pegs themselves don’t already include.
Key Takeaways
The Automower 115H runs on a wired boundary and guide wire system, and since the 115H specifically needs a guide wire to find its way home, this isn’t an optional add-on. Husqvarna’s official kits scale by lawn size (small, medium, large), and most 115H lawns near the mower’s 0.4-acre limit fit best in a medium or large kit rather than small. Heavy-duty 3.4mm wire costs a little more than standard kit wire but holds up better against edging tools and years of weather exposure. Keep spare pegs and a repair kit with waterproof connectors on hand, since wire breaks and peg shortages are the two most common reasons an install stalls partway through.
If you’re mid-install and something isn’t behaving the way this guide describes, Flavor Advisor’s team is happy to help you work through it.
Frequently Asked Questions
Does the Husqvarna Automower 115H need a boundary wire? Yes. The 115H is a wired-only model that requires both a boundary wire to define the mowing area and a guide wire to reliably find its way back to the charging station.
What size boundary wire kit do I need for a 115H? It depends on your lawn’s actual size and shape, not the mower model. Since the 115H covers up to 0.4 acres (about 1,618 m²), most 115H lawns fit best in Husqvarna’s medium kit (250m wire, up to 2,000 m² open lawn), though a small, simple lawn under 800 m² can use the small kit.
Can I use third-party boundary wire instead of genuine Husqvarna wire? Yes, third-party wire works with Automower systems, though Husqvarna recommends using wire from an official kit since it’s tested specifically for the system’s signal requirements.
What gauge is Automower boundary wire? Husqvarna’s Heavy Duty wire has a 3.4mm outer diameter with a 100% copper core. Standard wire included in entry kits is thinner. Third-party wire marketed as a comparable gauge to Husqvarna’s Heavy Duty spec is often listed around 16 AWG.
How do I add an island or extend my boundary wire after installation? Splice new wire into your existing boundary loop using a splicing kit and additional wire. You don’t need to reinstall the entire boundary to add an island or extend coverage.
How many wire pegs do I need for my installation? Official kits scale peg count with wire length, roughly one peg every half meter under normal conditions, but hilly, curved, or uneven lawns typically need pegs spaced closer together to keep the wire flush with the ground.
What comes in the Husqvarna Boundary Wire Repair Kit? It includes 5 meters of replacement boundary wire, 6 couplers, and 10 staples, sized for repairing a single break or minor reshaping rather than a full reinstall.
Do I need to bury the boundary wire underground? No. The wire can be stapled directly to the lawn’s surface. Within a few weeks of regular mowing, it settles into the grass and becomes nearly invisible.
What tools do I need to install an Automower boundary wire kit? Beyond the wire, pegs, splicers, and connectors included in the kit, you typically only need a pair of pliers, a mallet, and a small garden shovel.
Can I use the same wire for both the boundary and guide wire? Yes. Husqvarna confirms the same wire type is used for both the boundary loop and the guide wire path back to the charging station.
Sources
- Husqvarna US, “Automower® Wired Installation Made Simple” (guide wire requirement for 115H, splicing islands, wire staple installation): https://www.husqvarna.com/us/discover/automower-wired-installation-made-simple/
- Husqvarna US, “Automower® Installation Made Easy” (installation tools and steps): https://acc-test02.husqvarna.com/us/discover/automower-installation-made-easy/
- Husqvarna US, “Husqvarna Automower® Large Installation Kit” (kit sizing and coverage): https://www.husqvarna.com/us/robotic-accessories-and-installation-materials/automower-large-installation-kit/
- Husqvarna UK, “Husqvarna Automower® Installation Kit” (small/medium/large contents and part numbers): https://www.husqvarna.com/uk/robotic-lawn-mower-installation/automower-installation-kit/
- Husqvarna US, “Boundary wire repair kit” (repair kit contents): https://www.husqvarna.com/us/robotic-accessories-and-installation-materials/automower-boundary-wire-repair-kit/
- Safford Equipment Company, Husqvarna Heavy Duty Boundary Wire product data (3.4mm diameter, copper core): https://saffordequipment.com/product/husqvarna-500m-black-heavy-duty-automower-boundary-wire-522914111/
- Husqvarna US, “Automower® 115H BLUETOOTH Self-Install” support page (0.4-acre coverage spec): https://www.husqvarna.com/us/support/automower-115h/