
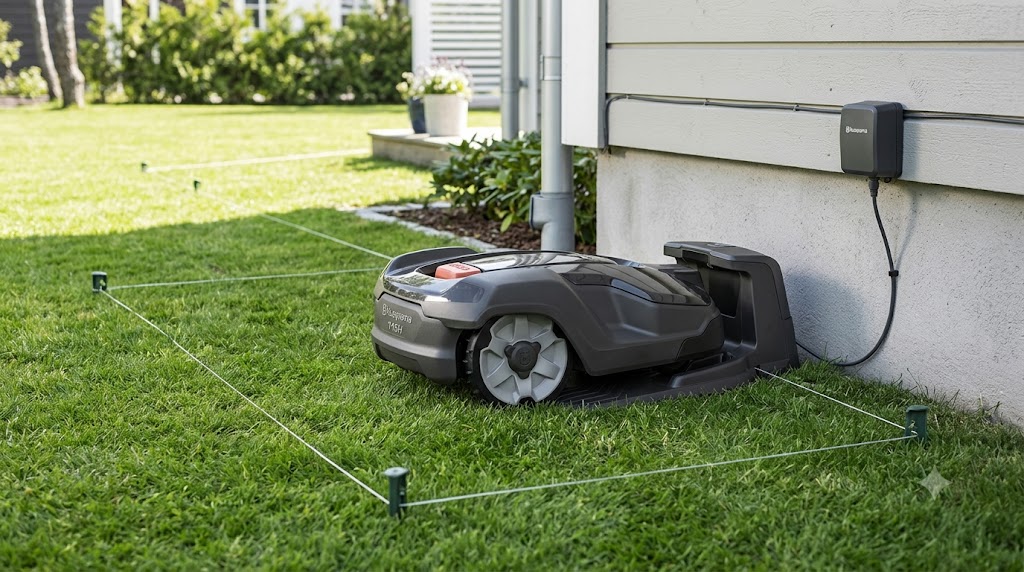
Most people assume a robot mower shows up ready to work like a Roomba. It doesn’t. The Automower 115H arrives as a kit: a mower, a charging station, a spool of wire, stakes, connectors, and a cardboard ruler you’ll actually use. The good news is Husqvarna built the whole process to be done in an afternoon with tools you probably already own.
Short answer: Installing the Husqvarna Automower 115H involves placing the charging station on level ground near a power outlet, laying a boundary wire around your lawn’s perimeter and any obstacles, running a guide wire back to the station (required on this model), connecting the wires to the station, and running the mower’s startup sequence with the default PIN of 1111. Most homeowners finish in 2 to 5 hours, depending on lawn size and how many obstacles need to be wired around, according to Husqvarna’s own installation guidance.
Here’s the full walkthrough, based on Husqvarna’s official installation documentation and the 115H’s operator’s manual.
What comes in the box
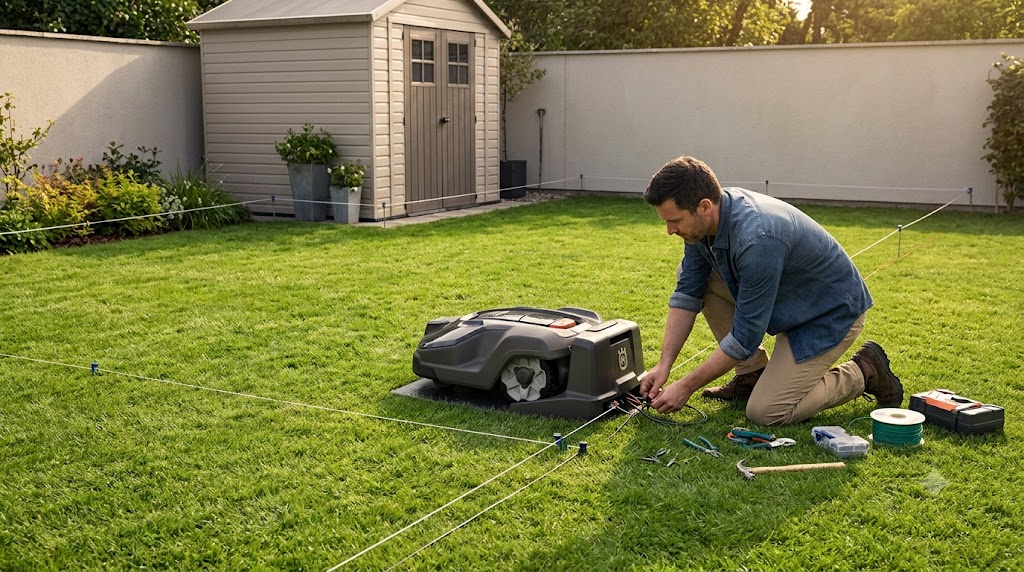
The 115H’s self-install kit includes the mower, charging station, a low voltage power cable and power supply, boundary and guide wire, wire stakes, wire connectors and couplers, a measuring ruler, replacement blades and screws, and an Allen wrench for securing the charging station. You’ll need to supply your own pliers, a mallet or hammer, and a small garden shovel if you plan to bury any sections of wire.
Before installation day, call your local 811 utility locating service to have underground lines marked, since you’ll be staking or burying wire across the yard. Confirm you have a working outdoor power outlet within 30 feet of where the charging station will sit, and mow your lawn short the day before. Short grass lets the wire lie flat against the ground instead of getting caught up in longer blades, which reduces the risk of the mower’s blades accidentally cutting the wire.
Step 1: Plan the layout before you touch a wire
Walk the lawn first and sketch it out, noting slopes, narrow passages, flower beds, tree roots, and anything you don’t want the mower driving over. Fill in any holes or low spots in the lawn ahead of time, since uneven ground can cause the boundary wire to sit unevenly or trip the mower’s tilt sensor. Pick up sticks, toys, hoses, and other loose debris while you’re out there.
This is also when you decide where obstacles need “islands,” which are wire loops that isolate flower beds, ponds, or trees from the mowing area without cutting off the rest of the lawn.
Step 2: Place the charging station
The charging station needs a level surface with a maximum tilt of about 2 cm (0.8 in), at least 2 meters (6.6 ft) of open space directly in front of it for the mower to enter and exit, and roughly 30 cm (12 in) of clearance to the sides. Keep it near an outdoor outlet, out of deep shade if possible, and away from anywhere water pools after rain.
Don’t secure the station permanently yet. Set it in place, but wait until the boundary wire is laid out so you can confirm the position works before driving in the ground screws with the included Allen wrench.
Step 3: Lay the boundary wire
The boundary wire defines the exact area the 115H is allowed to mow. It can be stapled directly to the surface of short grass, where it will work its way into the turf and disappear within a few weeks, or buried up to about 8 inches deep if you’d rather not see it at all.
Distance from obstacles matters here. Husqvarna’s manual specifies keeping the boundary wire roughly 35 cm (14 in) from hard edges like walls or fences, about 30 cm (12 in) from lawn edges, and around 10 cm (4 in) from certain low obstacles, with the included ruler making these measurements easy to check as you go. Passages narrower than 2 meters (6.5 ft) need a guide wire running through them so the mower doesn’t get confused about which side of the gap it’s on.
Start and finish the boundary wire loop at the charging station, leaving about 50 cm (2 ft) of extra wire on each end for connecting later. Space stakes roughly 70 cm (2 ft 6 in) apart on level ground, and add extra stakes on uneven sections to keep the wire pinned down. Avoid sharp angles in the wire path, since kinks can damage it over time.
Step 4: Install the guide wire
Unlike some higher-end Automower models, the 115H requires a guide wire to find its way home efficiently. The guide wire runs from the charging station out into the lawn and gives the mower a “trail” to follow back when its battery runs low, rather than wandering the boundary wire until it happens to bump into the station.
Lay the guide wire at least 30 cm (12 in) away from the boundary wire so the mower’s sensors can tell the two signals apart. The same wire spool used for the boundary wire works for this, and Husqvarna recommends sticking with the wire included in your kit since it’s tested for the mower’s signal requirements.
Step 5: Connect everything to the charging station
Tilt open the top of the charging station to access the connection points. Using the included wire connectors, insert each wire end and close the connector with pliers, trimming the wire to leave about 1 to 2 cm (0.4 to 0.8 in) protruding. Push the boundary wire connectors onto the marked pins inside the station, then do the same for the guide wire.
Once everything is connected, secure the charging station to the ground using the ground screws and Allen wrench included in the kit. Plug the low voltage cable into the station, connect it to the power supply, and plug that into your outdoor outlet.
Step 6: Run the startup sequence
Place the mower in the charging station and turn it on. The first startup walks you through entering a PIN, and Husqvarna sets the default startup code to 1111 before you’re prompted to create your own. From there, use the arrow buttons and OK button on the keypad to set your language, country, date, and time.
Enter your estimated lawn size when prompted (an approximate figure is fine) and set your preferred security level, which controls how the mower’s anti-theft alarm and PIN lock behave. Pair the mower with the Automower Connect app over Bluetooth if you want scheduling and remote start and stop from your phone.
How long does this actually take
Husqvarna states that a full DIY installation typically takes 2 to 5 hours, depending on lawn size and how many obstacles need wiring around. Simpler, smaller lawns with few obstacles tend to land on the shorter end. A yard with several flower beds, a pool, or a narrow side passage between the front and back lawn will push you toward the longer end, mostly because of the extra time spent laying islands and passages correctly.
If you’d rather not do it yourself, Husqvarna dealers offer professional installation for an added fee, and it’s worth asking about if your yard is heavily landscaped or you’re not confident measuring wire distances by hand.
Common installation mistakes to avoid
A few issues come up repeatedly in Husqvarna’s own troubleshooting guidance and installer forums:
- Wire spliced too close to itself. If the boundary and guide wires run parallel within less than 30 cm of each other outside of an intentional island, the mower’s sensors can lose track of which wire is which.
- Charging station on uneven ground. More than about 2 cm of tilt can cause docking failures, since the mower needs a fairly flat approach to seat correctly.
- Skipping the pre-mow. Tall grass hides low spots and makes it harder to staple wire flush to the ground, which increases the odds of the mower’s blade nicking the wire later.
- Forgetting the guide wire. The 115H specifically needs one to route home efficiently. Skipping it doesn’t stop the mower from working, but it will wander the boundary longer before finding the station, which drains the battery faster.
Life after installation
Once everything is wired and the startup sequence is done, the 115H covers about 720 square feet per hour and runs roughly 60 minutes on a full charge before returning to recharge, which also takes about 60 minutes. It’s rated for slopes up to 30 percent inside the main mowing area, though the incline right at the boundary wire itself should stay closer to 15 percent for reliable navigation. Cutting height adjusts between 2 and 3.6 inches, and the built-in lift and PIN-protected alarm system are active as soon as setup finishes.
If you’re shopping for the mower itself before you get to this stage, the Husqvarna Automower 115H 4G comes with the full self-install kit described in this guide, including the charging station, boundary and guide wire, and connectors.
As an Amazon Associate, this site earns from qualifying purchases. Check the current listing on Amazon for up-to-date pricing and included accessories before buying.
The bottom line
Installing the Automower 115H is closer to setting up an invisible fence than assembling a machine. The bulk of the work is planning your wire layout and physically laying it down, not anything mechanical. Locate your utilities first, mow short, measure obstacle distances with the included ruler, and budget an afternoon. Once the wire is down and the startup sequence is complete, the mower takes over the rest on its own.
FAQ
How long does it take to install the Husqvarna Automower 115H? Most installations take 2 to 5 hours, depending on lawn size and the number of obstacles that need boundary wire islands. Smaller, simpler lawns are typically done in under 3 hours.
Does the Automower 115H need a guide wire? Yes. Unlike some higher-end Automower models with alternate return methods, the 115H specifically requires a guide wire to navigate back to the charging station efficiently.
Where should I place the Automower charging station? On level ground (within about 2 cm of tilt) with at least 2 meters of open space in front of it, near an outdoor power outlet, and away from areas where water collects after rain.
Can the boundary wire be left on top of the grass instead of buried? Yes. Stapling the wire to the surface of short grass is a standard installation method, and the wire typically works its way into the turf and becomes hidden within a few weeks.
What is the default PIN code for a new Automower 115H? The default startup PIN is 1111. You’ll be prompted to set a new personal PIN immediately after entering it during the first startup sequence.
How far should the boundary wire be from obstacles? Husqvarna’s manual specifies roughly 35 cm (14 in) from hard boundaries like walls, about 30 cm (12 in) from lawn edges, and around 10 cm (4 in) from certain low obstacles, measured using the included ruler.
Do I need to bury the guide wire and boundary wire underground? No. Both can be stapled directly to the ground. Burying is optional and mainly used if you want the wire hidden immediately or if you’re installing across a driveway or path.
Can I install the Automower 115H myself, or do I need a professional? It’s designed as a self-install kit and most homeowners complete it without help. Husqvarna dealers also offer paid professional installation if your yard has complex landscaping or you’d rather not measure wire distances yourself.
What slope can the Automower 115H handle? It’s rated for up to 30 percent incline within the main mowing area, but the slope directly at the boundary wire should stay under about 15 percent for the mower to track and dock reliably.
What tools do I need to install the Automower 115H? A pair of pliers, a mallet or hammer for the wire stakes, a small garden shovel if burying any wire, and the Allen wrench included in the kit for securing the charging station.